

A resource for those seeking information on organizing and transforming spaces.

How to Resize a Photo for Print Without Losing Quality
A problem with modern amateur photography is that it is predominantly digital-based. Most camera phones of today by far outperform professional-level cameras of the past. Each year, the gap closes between camera phones and standalone cameras. However, most of the photos we take with our phones are designed to be posted on social media platforms and websites.

A problem with modern amateur photography is that it is predominantly digital-based. Most camera phones of today by far outperform professional-level cameras of the past. Each year, the gap closes between camera phones and standalone cameras. However, most of the photos we take with our phones are designed to be posted on social media platforms and websites.
When photos are taken from these sources, they can be difficult to print well while maintaining a high-quality image. For printing, the most critical factor is dots per inch (DPI). The higher the concentration of dots, the better quality your image will be. For high-quality printed photos, around 300 DPI is desirable. Quality ink or Canon toner cartridges can also help produce high-grade prints.
If you’re struggling to print a photo of adequate quality, you’re most likely encountering sizing issues. Fortunately, there are several ways to resize a photo for print without losing quality. The following guide takes you through the steps to achieve great-looking prints.
The Native Computer Editing Tool Technique
If DPI is the issue, your computer’s standard photo editing software should be sufficient to adjust the DPI. Here are the key steps:
Open the image file in preview mode.
Click on “Tools” on your menu bar.
In the dropdown, find “Adjust Size” and click on it. From here, you should be able to see different options for adjusting, such as “Width,” “Height” and “Resolution.”
Select “inches” for height and width. Choose “pixels/inch” for Resolution.
Ensure the “Resample Image” box is unchecked.
Set the Resolution to 300 pixels/inch or the highest possible number. The maximum width and height dimensions will adjust automatically.
When the image is resized to your desired dimensions, click “OK.”You can then save the file.
It is important to note that the aspect ratio doesn’t have to be perfect, as the image can be cropped easily.
Depending on the maximum DPI, you can experiment with different levels to determine how large you can make the image without losing quality. Find a balance between your desired size and quality before printing.
The Scanning Technique
Printing a smaller image at the highest possible DPI, and then scanning and printing, is a trick for enlarging a photo. This can be a highly effective way to maximize the size of a print while maintaining quality. However, it is dependent on the resolution of your scanner. A high-resolution scanner is capable of quadrupling the size of an image.
Similar to digital images, resizing with scanners comes down to DPI capabilities. Many regular scanners found in people’s homes can scan images at up to 1,200 DPI. This allows them to create quality images of much greater size than the original.
While many scanners are capable of 1,200 DPI scanning, they’re unlikely to be set to this number by default. You must first adjust the settings to 1,200 DPI. When you scan the file, you’ll have to alter the resolution of the digital file. This process is the same as the native computer editing method.
In addition to a high-quality scanner, it’s also important to have a printer with good native resolution. Otherwise, it won’t be capable of printing at high quality, regardless of the image size. Invest in good photo ink such as Canon ink cartridges for maximum quality.
For downsizing images, you never need to reduce the resolution.
Photoshop Method

If you have access to Adobe Photoshop, this is perhaps the best way to resize a photo or print. However, this software can be tricky to use, so you may want to familiarize yourself with it before attempting Photoshop editing. The following steps will help you to resize your photo exactly how you want to.
Resizing
Open your image in Photoshop.
Click the size dialogue box to bring up the “Width,” “Height” and “Resolution” options.
Set the resolution to 300 DPI, and then adjust the “Width” or “Height” to your desired size. Photoshop automatically adjusts to maintain the correct aspect ratio.
If enlarging the image reduces the DPI, you may have to upsample it to increase the quality.
Note that resizing an image will likely result in the file changing size. This is important if you have limited storage space and are editing multiple photos.
Upsampling
Upsampling involves increasing the quality (DPI) of the image manually. While all images have a maximum ceiling for quality, many photos can be upsampled effectively. Here are the key steps
Under the “Resolution” section in the dialogue box, tick the box next to “Resample.”
Enter your desired resolution. Ideally, this should be 300 DPI. However, you may be happier with a slightly lower quality print.
After upsampling, make sure to double-check the “Height” and “Width” settings in case there is an issue or automatic adjustment.
Interpolation
When an image is resampled, Photoshop adjusts the number of pixels. This is called interpolation. Multiple interpolation options can affect the end quality of the photo. The default automatic setting often gets the best-quality image, as Photoshop chooses what’s most suitable.
However, when enlarging images and upscaling the quality, the interpolation method called “Preserve Details 2.0” is the recommended setting, and it doesn’t get selected when interpolation is set to automatic. This setting is only available on Photoshop software from 2018 and onward.
Changing the Aspect Ratio
You may want to adjust the aspect ratio of your photo to fit a particular frame or space. This can be done through cropping:
Close the size dialogue box.
Select the “Crop Tool.”
In the “Options Bar,” enter your ideal aspect ratio into the “Width” and “Height” boxes.
Photoshop automatically reshapes the photo border, but you can resize it by dragging the outer handles of the image.
Save Your File
Once you have completed these steps, your photo or print is ready to save and print.
Create the Perfect Collage from Home
With the right software, printer and ink, you can create professional-level photos from home. Although it can take some tinkering, basic photo editing is relatively straightforward, allowing you to restore and resize your favorite memories.
It’s important to be realistic, however. Some old, grainy photos simply don’t have enough pixels to resize effectively. There must be a minimum resolution level for each photo to resize without losing quality.

3 Simple Ways To Transform Your Conservatory
Conservatories can be functional and beautiful rooms that bring some much needed brightness into a home, however often they are neglected as people believe they are too warm in the summer and too cold in the winter. Luckily, there are a few simple things you can do to transform your conservatory to make it functional all year round and also to make it look beautiful!

Conservatories can be functional and beautiful rooms that bring some much needed brightness into a home, however often they are neglected as people believe they are too warm in the summer and too cold in the winter. Luckily, there are a few simple things you can do to transform your conservatory to make it functional all year round and also to make it look beautiful!
Custom Blinds
One brilliant way to transform your conservatory is to have custom blinds fitted. Blinds companies will make made-to-measure blinds that will fit all of the windows, doors and roof panels perfectly. Many companies will have special fabrics that are designed for use in conservatories, which will keep the room warm during the winter and help it to stay cool in the summer.
During the summer, it can be difficult to control the light streams coming through, which can make things difficult if you are trying to use a laptop or TV screen. It can also get unbearably warm, so special fabrics designed for conservatory blinds will help to control the temperature and light effectively.
Also, blinds will help to prevent heat loss in the winter, making the space much more comforting. With blinds, you will also have much more privacy, so you might feel more comfortable using the space during the evenings. Custom blinds can completely transform the space, so that will help you to use it throughout the entire year.
Light Soft Furnishings
Conservatories can feel quite cold during the winter and also summer evenings, so light colored soft furnishings will help to warm up the space, whilst also making it look beautiful during the summer months.
Start with a large neutral colored rug and cushions in a similar tone, but a contrasting material, to add texture to the room. Warm woods work beautifully in a conservatory and will make the natural light look even more beautiful. Warm oak coffee tables and rattan plant pots will bring some color to the room whilst in keeping with the neutral color palette.
Finally, have a chunky knit throw on the sofa. This can be put away over the summer if you’d like, but it will make the room feel so much cozier. Along with the heat sensitive blinds, with the chunky knit throw you will feel so comfortable in the space all year round.
Introduce House Plants
House plants will transform your conservatory, bringing life and fresh air to the room. They will enhance the appearance of the space and even have the potential to boost moods and make you feel great. However, you will need to get quite specific houseplants to ensure they can thrive in the difficult conditions.
Succulents and cacti are very low maintenance plants that will survive well all year round in the conservatory, so that is the safest option. Only water when the soil is completely dry, which will take much longer in the winter months.
Final Thoughts
Conservatories should be utilized as they add so much to a property. These few small changes could make the room so much more homely, relaxing and comfortable all year round. Put your own personal twists on this space and enjoy!

4 DIY Backyard Projects to Tackle This Summer
Spring is the perfect time to get your backyard ready and looking great for all of your upcoming summer activities. If you love DIY projects, there are lots of fun and cheap ways to upgrade your backyard to make it a place you’ll want to spend every afternoon. Here are four DIY projects you should tackle to make your backyard the envy of all your neighbors.

Spring is the perfect time to get your backyard ready and looking great for all of your upcoming summer activities. If you love DIY projects, there are lots of fun and cheap ways to upgrade your backyard to make it a place you’ll want to spend every afternoon. Here are four DIY projects you should tackle to make your backyard the envy of all your neighbors.
Walkways
Backyard walkways are an easy way to upgrade the look of your backyard while keeping your flowerbeds, garden, and shrubbery safe from wandering feet. Installing a walkway in your backyard is an easy weekend project, and can be done for cheap depending on the type of material you decide to use:
Concrete. Concrete pavers are an easy and cheap material to use to build out a custom walkway. You can either buy pre-molded pavers or pour the concrete yourself. If you have a large backyard, pouring the concrete yourself may actually be cheaper and can be done easily with just a few tools. You may need to rent some larger tools from your local construction company, but often that is still cheaper than hiring a whole crew. Make sure to have extra concrete sand to use as a base underneath the pavers and to fill in the joints.
Flagstone. The rough and asymmetrical edges of flagstone make it a popular option for outdoor designers looking to build a path that looks modern but also blends into the natural landscape. Make sure to get flagstone pieces that are at least 3/4 inch thick so they don’t crack under the weight of people walking.
Gravel. If you want a more informal feel to your backyard walkway, gravel is an inexpensive material to use. You can buy it in bulk and use larger stones as edging to keep the gravel from spreading into your garden or grass.
Mulch. Mulch is one of the cheapest materials to use for your walkway. Since it’s lighter than stone, it will be easier to haul and spread across your backyard. Keep in mind that mulch is an organic material and will decompose over time. You’ll have to replace the mulch every few years to keep it looking good and draining well.
Gardens
Planting and taking care of your own garden can be one of the most rewarding hobbies out there. It’s great exercise, you learn a lot, and you get to harvest deciduous crops at the end of the season. You don’t have to be an expert gardener right from the beginning; you just have to have a few basic tools, some seeds, and a lot of patience. If you need extra storage you can research sheds for sale near me.
Before you can plant your first garden seeds, you have to properly set up your backyard garden so it’s the right environment for your crops to grow. You’ll want to keep in mind:
The size of your garden
The type of plants and crops you want to grow
Its orientation to the sun and how much shade it will get
How exposed to the wind the location is
Irrigation needs
The slope of your backyard
The preferred soil of your crops
Patio
Backyard patios are the perfect place to hang out with friends, spend time with family, and take an afternoon snooze. Building one from scratch is a big DIY project but will be more than worth it by the time summer rolls around.
If you’re building a patio from the ground up, you will need to buy gravel, sand, and your preferred patio building material. Most patios use bricks, flagstones, or pavers for the base. If you don’t want to set each individual stone and don’t mind a more industrial feel to your patio, you can also pour a concrete slab. The actual process is relatively simple:
Outline your patio and remove the sod. The final area should be around five inches deep plus the thickness of the flagstone, brick, or paver you’re going to be setting.
Add landscaping fabric to the patio ground. This prevents weeds from sprouting in between the stones.
Add gravel and sand to the patio area. This layer should be around four inches deep. Make sure to tamper it down to create a firm and smooth base surface.
Place your stones. You can get creative with this step and make your own stone design like a jigsaw puzzle. If you’re using pavers or bricks, get creative with your placement: herringbone, pinwheel, or running bond are popular placement designs that can make your patio look professionally placed.
Top with sand. After everything has been placed, use a broom to sweep patio sand into every crack. Spray with water to make sure everything is settled in.
BYOBF (Build Your Own Bird Feeder)
Bird watching is a fun and relaxing way to spend your free time. If you want the birds to come to you instead of having to hike into the mountains to scout them out, bird feeders are an easy way to attract local wildlife from the comfort of your own backyard.
There are lots of pre-made bird feeders out there you can buy, but if you want to make this a DIY project, you can build one at home. This is a project you can really get creative with and even let your children help. Attracting birds to your backyard can also be a great learning opportunity for your children—buy a birdwatching book and make it a game for your kids to identify as many birds as possible.
4 Types of Flooring That Will Make Your Living Room Stand Out
Whether you bought a new house or you just constructed one, it’s likely that you’ll want to make the living room floor appear beautiful. The living room is the first point of contact for your visitors and determines how people perceive your home.
However, most homeowners often find it challenging to choose the best flooring types because there are a variety of options today. Below are types of flooring options that will make your living room look more appealing.
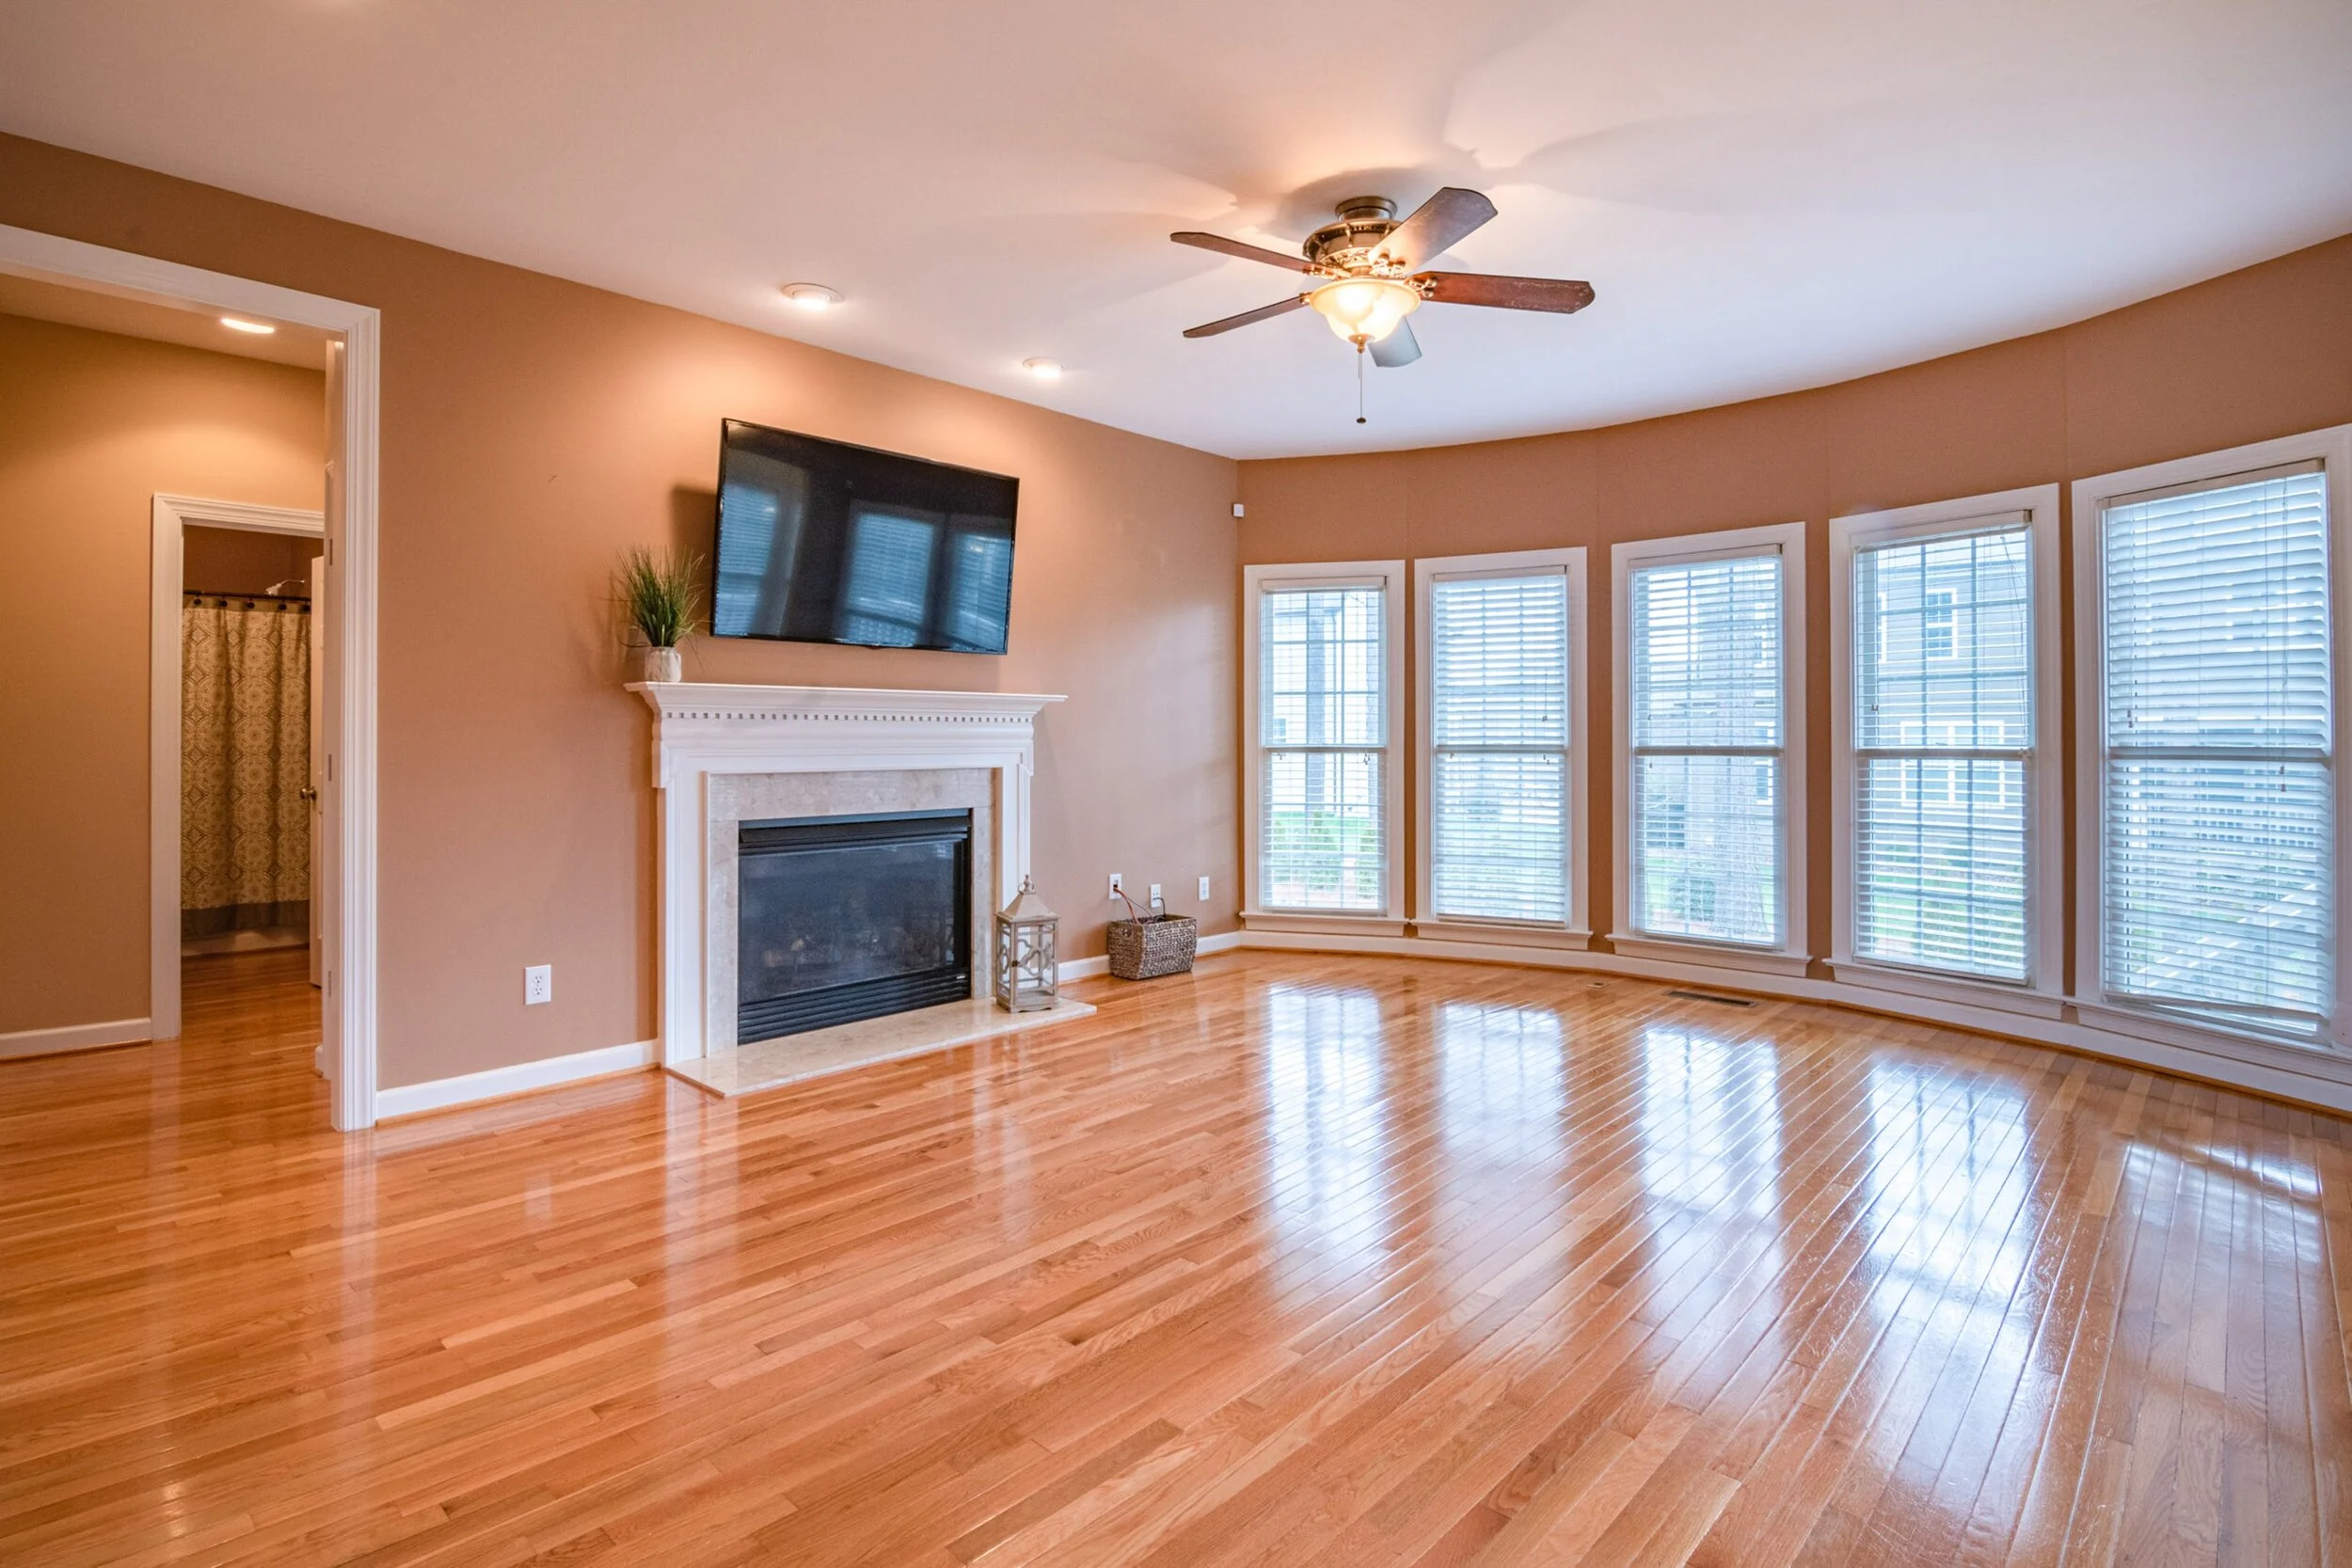
Hardwood Floors
Hardwood flooring is a popular floor type made from different types of wood such as oak, bamboo, maple, and cherry. It is a classic flooring type preferred by most homeowners and can make your home appear elegant and luxurious.
Hardwood floors appear smooth, polished, and can be customized to match your specifications. They appear in light, medium, and dark forms and come in a wide range of decors ranging from Asian to Mediterranean, and can have traditional and modern designs. Hardwood can make your home more beautiful with a natural and classic charm. It is easy to maintain and adds value to your home.
Engineered Flooring
Similar to hardwood floors, engineered flooring is made to match the appearance of natural timber. However, this kind of flooring has a considerably lower price tag compared to other materials. Engineered floors are often considered to be a wise investment due to their durability and long lifespan. If you plan on staying in our current home for a long time, engineered flooring may be an excellent option.
Ceramic Tile
If you are looking for water and stain-resistant floors, then ceramic tiles will be an ideal option for you. They do not retain dust compared to other flooring types. You do not need to polish ceramic tiles to maintain an appealing finish because they appear shiny if your clean them daily.
They are easy to clean and a great flooring option for people with allergies. Another significant benefit is that they are slip-resistant, making them suitable for homes with children or people with disabilities.
Concrete Flooring
Using concrete floor types makes your floor durable compared to other floor types. They do not need high maintenance, and you only need to seal them once per year.
Concrete floors come in different colors and textures and make your floor appear smooth. You can then top up the floor with rugs and cozy carpets to make it versatile with unique designs. They are also environmentally friendly and come with comfort.
Travertine
Travertine flooring has a marble-like texture floor type with a unique composition. It is attractive with natural colors such as gold, brown, tan, and beige and a stylish organic presence. Travertine comes in the form of tiles and is made from durable stone. The materials used for this flooring are heavy and require a regular sealing of the surface.
When choosing a flooring option for your living room, you need to consider multiple factors to enable you to make informed decisions. It will also depend on your budget and personal preferences.