

A resource for those seeking information on organizing and transforming spaces.

Top Tips for a Concrete Front Porch Repair
Could your concrete front porch use some love? Is it looking sad and worn down? Follow these surefire tips to ensure a solid front porch repair.
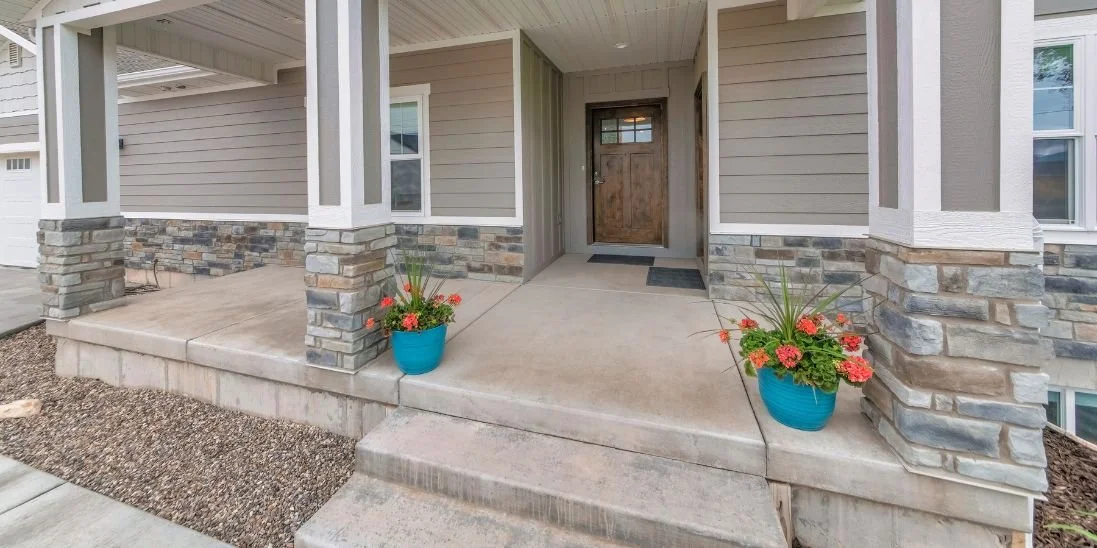
The front porch, a quintessential part of many houses, is where first impressions and memories happen. Even the most robust concrete surfaces can show signs of wear and tear with time and the elements. A concrete front porch repair is an investment in the home’s appearance and overall structural integrity. Take a look at this blog to explore tips to help with your concrete front porch repair.
Assess Your Concrete’s Condition
Understanding the extent of the damage is crucial before the repairs begin. Cracks, spalling, and settlement are common issues ranging from superficial to potentially hazardous. Engage in a thorough inspection, take note of the patterns and sizes of any visible damage, and consider professional help if the issues seem complex.
Preparation Is Key
Equipping yourself with the correct tools and materials is your gateway to successful repairs. You’ll likely need a chisel, wire brush, and a suitable concrete repair mix for smaller, manageable jobs. For projects where structural integrity is a concern, consult professionals.
Safety is paramount. Wear gloves and safety glasses, and prepare the area to avoid accidents or mishaps.
Efficiently Execute the Repair
When it comes to mending your porch, there are specific methods for different types of damage. For surface issues, carefully fill cracks and use a trowel to repair spalling. In the case of more severe settling or heaving, you may need to raise the slab back to its original position through concrete raising. Concrete raising is the best repair option for settled slabs, ensuring a level surface without the cost and disruption of replacement. After the repairs, seal your concrete to protect it from the elements, preventing future problems.
Invest in Longevity
A job well done should last, and regular maintenance can ensure it does. Periodically inspect your front porch for emerging issues, reapplying sealers as needed. In regions with extreme weather, consider applying coatings that offer extra protection against erosion. Preventative measures now can save you from costly repairs down the line.
Weighing the Costs
Finally, consider the cost-benefit of DIY repairs versus professional services. Doing it yourself can be economical and rewarding for small, manageable tasks. Meanwhile, you should leave larger jobs involving structural integrity to the experts with the equipment and knowledge to ensure a safe, high-quality result.
When dealing with a concrete front porch repair, the above tips will ensure a secure and welcoming space for your home. Following these tips can save you money and contribute to the long-term value of your property. Stay proactive with your maintenance, and remember, a solid front porch is more than just a landing spot—it’s a foundational element of your household.

How To Properly and Legally Install a Mailbox
Before you purchase a mailbox, consider if there are any legal steps you should take first. Learn how to install a mailbox properly and legally here.
Your mailbox is more than a place for deliveries; it’s the first functional item guests or passersby note. While seemingly mundane, its installation can serve as an introduction to conscientious homeownership, safety, and neighborhood orderliness. Below, we explore how to properly and legally install your mailbox so that you uphold USPS and local regulations and ordinances while protecting your mail.
Understanding the Regulations
Mailbox installation may seem straightforward, but there’s a list of official rules to adhere to. Whether federally stipulated by the USPS or dictated by county or city-level ordinances, the guidelines hold significance for uniformity and efficient mail delivery. Addressing USPS mailbox space requirements and local government laws ensures consistency and a streamlined process for postal workers, protects your mail, and facilitates an organized system.
USPS guidelines mandate the installation of mailboxes at a height of 41- 45 inches from the road surface to the bottom of the mailbox or point of mail entry and 6- 8 inches back from the farthest end of the curb or road edge. These might change slightly for curbside delivery in certain rural or residential areas. It’s essential to research and comprehend the specific requirements for your region before commencing the installation process.
A Step-By-Step Guide to Installation
Installing a mailbox involves strategic location selection, secure post setting, and durable mounting. The post for your mailbox should be at least 24 inches deep, which requires digging a sizable hole. Once set, the mailbox should be firmly attached and spaced away from the post to allow easy delivery and collection. Visibility from both directions is critical for post safety and the convenience of passersby and postal workers.
Markers with your street address should be easily visible, often reflective or highly contrasting, to ensure prompt and safe mail delivery. It’s vital to avoid overlooking this step for emergency purposes. Effective installation means not just functionality but a commitment to the aesthetics and utility of your home’s exterior.
The Art of Maintenance
Your mailbox is an outdoor fixture subject to constant exposure to the elements, and periodic maintenance is key to its longevity. Regular checks to ensure stability, look for signs of wear, and clean the box are important to prevent mail theft and to maintain curb appeal. Weatherproofing your mailbox, especially if it’s wooden, is vital to avoid damage from rain and snow while repainting can prevent rust and enhance visibility.
Properly installing a mailbox to meet legal and aesthetic parameters might sound mindless, but it’s an essential part of home upkeep that protects many things surrounding your contents. These efforts stand as a testament to your commitment to being a responsible community member. By adhering to a correct and legal installation, you contribute to your local postal service’s overall order and efficiency.

Organizational Tips To Maximize Your Yurt Living Space
Living in a yurt has benefits, but you’ll also need to get creative about storage. Here are some organizational tips to maximize your yurt living space.

Yurts, much like other tiny houses, are synonymous with minimalistic living. Sure, you’ll go through your things and downsize, but you’ll still need an organizational plan. Getting creative about storage becomes part of your life. You have to figure out ways to ensure everything has a place to keep the yurt from cluttering. Continue reading for organizational tips to maximize your yurt living space.
Add Upper Storage
A loft is a perfect way to add more living and organizational space. A yurt’s high ceiling makes it ideal for this storage type. You can store all your kids’ toys, books, and games. It can also be a place to store your seasonal items that you don’t use year-round.
Turn the loft into a guest bedroom to create more privacy and seating downstairs. Use the loft walls on the bottom level to build a pantry for additional kitchen storage.
Install Tall Bookshelves
Many traditional homes use tall bookshelves to create more storage space. Yurts can also use them! Books aren’t the only thing you can use bookshelves for. They’re also perfect for showing off artwork, baskets, potted plants, family photos, and trinkets from your travels. They will make your yurt feel homier and more inviting.
Tall bookshelves also make the space feel bigger by drawing your eyes upward. It creates an illusion and gives an aesthetically pleasing look. Use the baskets to store unused items you want to hide.
Purchase Multi-Purpose Furniture
Multi-purpose furniture can truly transform a place. Look for pieces that can expand and convert. A coffee table or couch with hidden storage are two perfect options. You can store extra blankets, pillows, and bedding in these areas.
Expandable tables are wonderful for yurts. You can leave them small for daily use and expand them when needed. It provides more seating when you have company over. Murphy beds are another excellent option. They allow you to store your bed when you require more space.
Utilize the Outdoor Space
Yurt living is also synonymous with a natural or outdoorsy lifestyle. In fact, that’s one of the benefits of living in a yurt. Create an outdoor oasis to utilize the space. Build an outdoor kitchen and seating area where guests can gather. Make a fire pit where you can congregate when it’s chilly outside. These ideas allow you to use your space more effectively and efficiently.
All these organizational tips will help you keep your yurt organized. Find the ideas that work for you and implement them. It may take some trial and error, but you’ll eventually find what works.